How to Cross Stitch: A Beginner's Guide to Masterful Crafting
Cross stitching is a form of hand embroidery that's been around for centuries, celebrated for its versatility and the beautiful patterns it can create. Starting with a simple grid of fabric, we create a series of X-shaped stitches that build up to form a picture or design. It's a hobby that offers a sense of accomplishment and can be as simple or complex as we wish, making it accessible for beginners and satisfying for experienced stitchers alike.
.jpg)
Choosing the correct materials and understanding the basic techniques are essential for starting a cross stitch project. We select aida fabric, embroidery floss, and a needle as the basic tools. Then, by following a pattern and counting squares on the fabric, we meticulously create each stitch. Over time, the repetitive motion of needle and thread becomes a meditative practice, and the emerging design a testament to our patience and skill.
Key Takeaways
- Cross stitching is an accessible craft that allows for creative expression.
- Proper materials and a good understanding of the technique are important.
- The activity can be both a meditative practice and a rewarding accomplishment.
What You'll Need
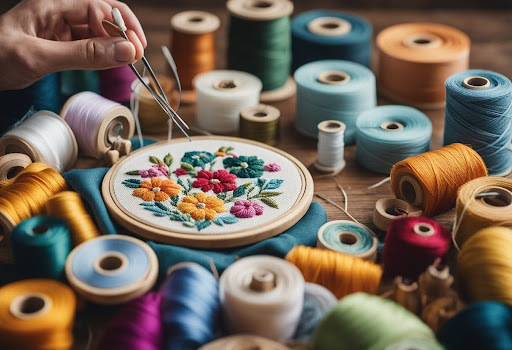
To begin our cross stitch project, we'll ensure we have the right materials and tools. Here's a structured list of essentials:
Basic Supplies:
- Fabric: We'll use an even-weave fabric such as Aida, which is perfect for beginners, or linen for more experienced stitchers.
- Embroidery Floss: We'll select high-quality stranded cotton in colours required for our chosen pattern.
- Needles: Embroidery needles, size 24 for Aida or 26 for linen, will work best.
- Scissors: A small, sharp pair dedicated to our craft will ensure clean cuts.
Tools:
- Embroidery Hoop: This keeps the fabric taut and provides an easier stitching surface.
- Needle Threader (optional): This tool can help us thread needles with ease.
- Pattern: We'll choose a design that suits our skill level, printed clearly.
Organisation:
- Floss Organiser: Keeping embroidery floss tangle-free and sorted by colour will save us time.
Extras:
- Magnifier (optional): For those of us who need a little extra help seeing the finer details.
- Lighting (optional): A good light source can prevent eye strain and make stitching more comfortable.
We'll gather these items before starting, ensuring a smooth and enjoyable cross stitching experience.
Instructions
To start cross stitching, we need to gather our materials: aida fabric, embroidery floss, a needle, scissors, and a hoop. We'll first prepare the needle by threading it with an appropriate length of floss, usually about 45 centimetres to prevent tangling.
Next, we secure the fabric in the hoop, ensuring it is taut. We begin stitching from the centre of the fabric to maintain symmetry in our design. To find this point, we fold the fabric in quarters and mark the centre.
We initiate the stitching process by bringing the needle up from the back of the fabric at a starting point, leaving a small tail at the back. We then create a row of half stitches (/) before returning to complete the Xs, which guarantees even tension and a neat finish.
Basic Cross Stitch Instructions:
- Thread the Needle:
- Cut a length of floss, about 45 cm.
- Thread the needle and tie a small knot at the end.
- Secure the Fabric:
- Place fabric within the hoop and tighten.
- Ensure fabric is smooth and tight like a drum.
- Find the Centre:
- Fold fabric into quarters.
- Mark the centre point.
- Start Stitching:
- Bring the needle up from the back to the front at the centre mark.
- Begin with half stitches (/) across the row.
- Make a Cross:
- Complete each X by stitching back () over the half stitches.
We must weave the tails into the back of our stitches to anchor them, avoiding knots which can create lumps. By following these steps meticulously, we'll create a clean and beautiful piece of cross stitch art.

