Beading How To: Craft Beautiful Jewelry with LindeHobby's Expert Tips
Beading is a wonderful way to express creativity and a great addition to any crafting hobby. It's not just about making something beautiful, but also finding tranquility and joy in each bead you string. You'll find beading both relaxing and rewarding, making it an amazing hobby for anyone looking to unwind and explore their artistic side.
Begin with gathering the right materials and tools. High-quality beads, threads, and needles make a big difference in your projects, and you can find a variety of these at LindeHobby. Once you have everything ready, learning a few basic techniques will set you on the path to creating unique and personal pieces.
Dive into simple projects to build your confidence and experiment with different styles. You can make bracelets, necklaces, and even decorative items for your home. The possibilities are endless, and as you grow more confident, your creativity will flourish.
Key Takeaways
- Beading is relaxing and creative.
- Quality tools improve your projects.
- Start simple and explore endless designs.
Beading Materials and Tools
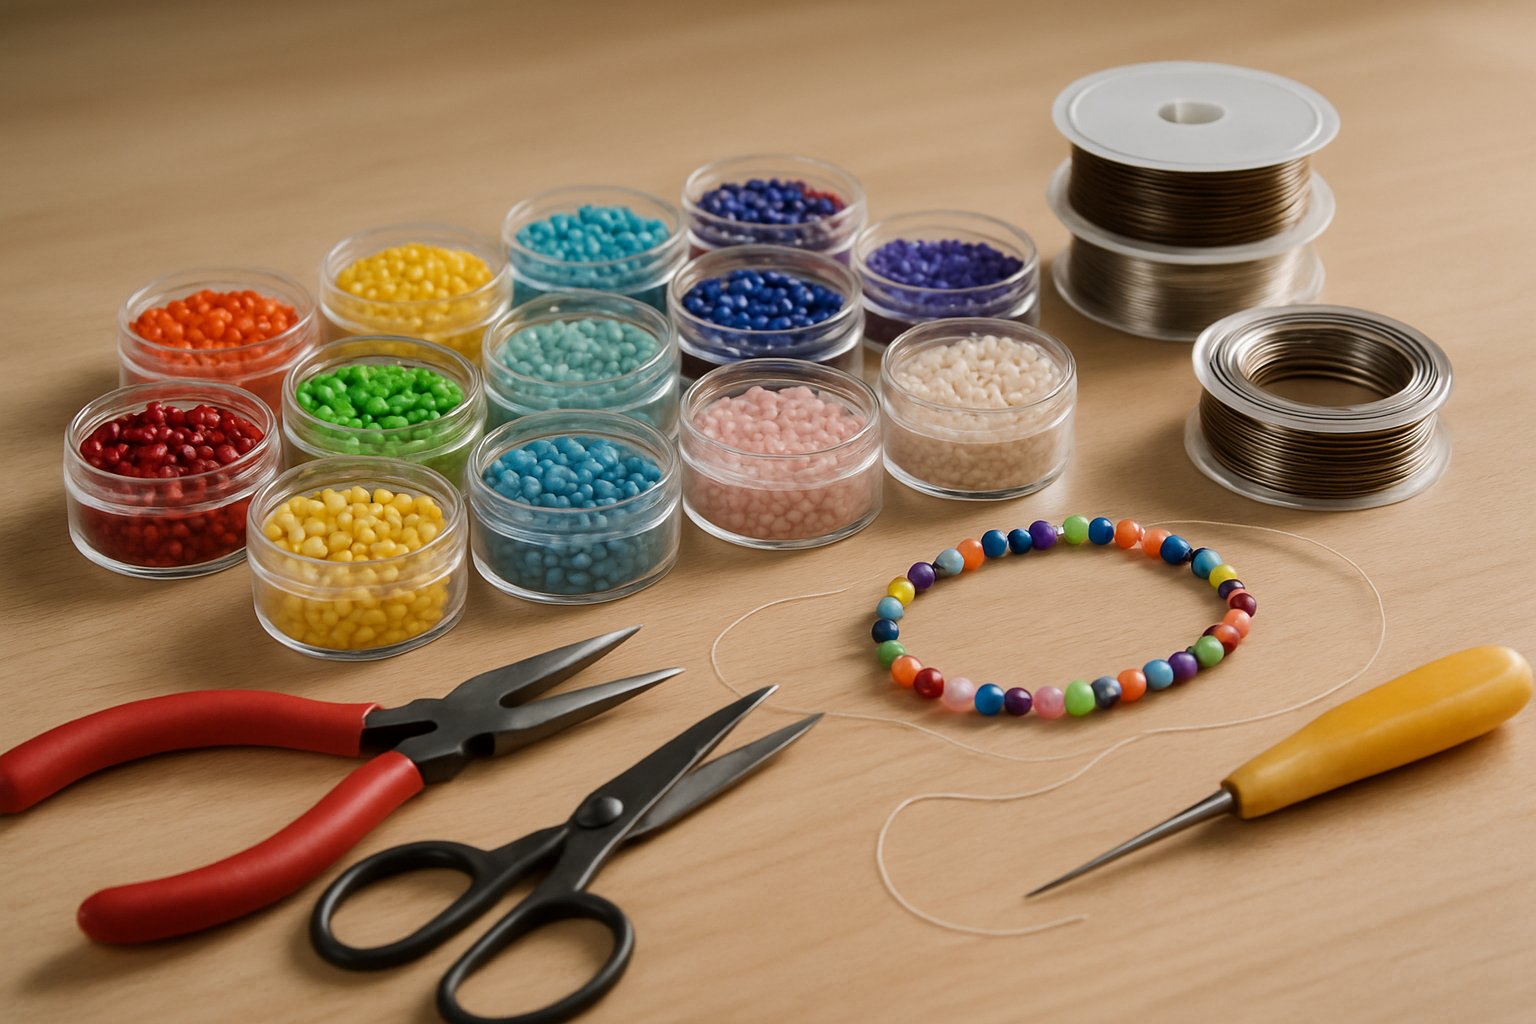
Begin your beading journey with the right materials and tools. It's essential to know what supplies are necessary and how to use them. Discover how to select beads that suit your projects and why choosing the right needles and thread makes a big difference.
Essential Beading Supplies
For a rewarding beading experience, there are key supplies you'll need. Start with a beading board; it helps organize beads and plan designs. Next, get bead organizers to keep everything tidy.
Needle-nose pliers are crucial for gripping and bending wire. Wire cutters will make trimming wire a breeze. Don’t forget crimping tools; they ensure your beads are securely fastened. Visit LindeHobby for top-quality, affordable supplies to set you up for success.
Choosing the Right Beads
Choosing the right beads enhances your designs. Seed beads are versatile and great for various patterns. Use glass beads for more color and shine; they add elegance to any piece. For unique designs, consider crystal beads—available in various shapes and finishes.
Experiment with wooden beads for an organic touch in your projects. Check out LindeHobby’s diverse bead selection catering to all tastes and budgets, inspiring you to create standout pieces.
Selecting Needles and Thread
Selecting appropriate needles and thread types ensures the durability of your creations. Use beading needles designed for the intricate work of threading through beads. Choose a size that fits comfortably through your chosen beads without snagging.
Nylon thread is strong and stretchy, perfect for bead weaving. For intricate designs, fishing line or beading wire can be good choices. Invest in quality options from LindeHobby to keep your craftwork polished and professional.
With the right tools and materials, your beading projects are sure to shine. Discover your next favorite product from the extensive range at LindeHobby, and start crafting beautiful, personalized jewelry today!
Fundamental Beading Techniques

Learn these essential beading techniques to create beautiful jewelry. From simple stringing to securing with knots and crimps, these methods will provide a solid foundation for any beading project. You'll need basic tools and supplies like string, beads, crimps, and closures. Get ready to design unique and custom pieces you can easily make at home.
Basic Stringing Methods
Stringing beads is one of the most common ways to create jewelry. Start by choosing your beading wire or thread. Beading wire is sturdy and great for necklaces or bracelets, while nylon thread is flexible. Depending on the project, select between heavier or lighter wire.
Begin by arranging your beads in the desired pattern. You can use a beading board to lay them out first. Thread the beads according to your pattern, leaving some space at each end for closures.
Remember: It's best to plan your design in advance. Keep experimenting with shapes and colors for endless combinations. Purchase your materials, like wire and diverse beads, from LindeHobby to ensure quality without breaking your budget.
How to Tie Secure Knots
Proper knot tying is crucial to keep your pieces intact. For most projects, a surgeon’s knot is reliable. To tie a surgeon’s knot, wrap the thread around the beads and tie a double knot, looping twice through the loop. Pull tightly to secure.
Square knots are another option for tying. Wrap the thread around and cross the ends over each other. Pass the ends through the loop, then pull tight. Feel free to repeat this step for extra security.
If you are using stretchy cord, the triple knot works best. Apply a small dab of glue to strengthen. Stock up on different threads and glue at LindeHobby for optimal results.
Using Crimps and Closures
Crimps secure the beads in place, preventing them from sliding off. After stringing, place a crimp bead on each end. Use crimping pliers to flatten and secure the crimp. This keeps the beads from falling when worn. Add a crimp cover for a polished look.
Closures like lobster clasps, toggles, or magnetic clasps finish the project. Attach one end of the wire to the clasp with a crimp bead. Repeat on the opposite side. For added safety, use clam shell bead tips to hide knots inside.
Clasp the finished piece for wear, or proudly gift it! Find these supplies at LindeHobby and try out different closure styles to suit any design.
With these techniques, you're ready to start beading. Discover LindeHobby's vast selection to inspire your creative journey!
Creative Beading Projects
Get inspired to start making beautiful beaded jewelry. Discover how to create a simple bracelet and a more detailed necklace. Both projects use basic techniques and offer exciting possibilities for personal expression.
Making Your First Beaded Bracelet
Creating your first bracelet is a rewarding project that is perfect for both beginners and experienced hobbyists. You'll need some beads, elastic string, and a clasp. Choose beads that speak to your style—glass, wood, or gemstone.
- Gather Supplies: Explore LindeHobby's selection of beads and strings.
- Measure and Cut Elastic: Wrap the elastic around your wrist, leaving extra for tying.
- String the Beads: Mix and match colors and patterns.
- Secure the Clasp: Use a knot followed by a dab of glue for extra hold.
This bracelet can be given as a gift, or worn with casual outfits. Its simplicity keeps it stylish, and crafting it can be a relaxing experience.
Designing a Beaded Necklace
Designing a necklace offers endless creative opportunities. Start by choosing a theme or color palette. The materials needed are beads, a needle, beading thread, and a clasp set.
- Plan Your Design: Sketch or lay out your beads on a mat.
- Threading: Begin threading beads carefully, using a pattern or mix for texture.
- Finishing Touches: Attach the clasp to the ends with strong knots.
For a sophisticated look, use uniform beads. For a trendy feel, try combining sizes and shapes. You can wear this with a wide range of outfits, from office to evening wear. Always remember that LindeHobby has a rich variety of beads to customize your creations with ease and flair.

