How to Crochet a Daisy Granny Square: A Passionate Guide for Hobbyists
Crocheting a daisy granny square can be a delightful way to add a touch of spring to your crochet projects. This charming pattern can be used for blankets, cushions, or even clothing. To start, all you need are a few basic supplies like yarn and a crochet hook, making it an easy and enjoyable project for beginners and seasoned crafters alike.
Creating these daisy squares is not only relaxing but also provides a wonderful chance to express your creativity. As you maneuver your hook to form each petal and corner, you'll find yourself unwinding from the day's stresses. These squares are versatile, allowing you to mix and match colors to perfectly fit your style.
If you're new to crochet, don't worry. This guide will offer easy-to-follow steps to help you craft beautiful daisy granny squares. Whether you're making a full blanket or just a few squares for practice, you’ll soon be able to join them with confidence. Check out the variety of yarns and hooks from LindeHobby to start your collection today!
See all our crochet patterns here
Key Takeaways
- Gather all essential materials before you start.
- Follow simple steps to crochet your daisy square.
- Explore creative ways to join and customize your squares.
Essential Materials and Tools
To crochet a beautiful daisy granny square, you'll need some key materials and tools. Choosing the right yarn, hook, and extra supplies will make your crafting experience smooth and enjoyable.
Choosing Yarn and Colors
Start by selecting the right yarn. Look for soft yarn that will feel comfortable. Cotton or acrylic yarns are great choices. Colors play a big role in how your daisy squares will look. You might want a bright yellow for the daisy center and fresh whites or greens for the petals and border.
Consider color combinations that match your style or home décor. Experiment with different shades to add a personal touch. You can find an array of exciting yarn options at LindeHobby, perfect for any budget or skill level.
Selecting the Right Crochet Hook
The crochet hook size is important for your square's look and feel. A 4.0 mm to 4.5 mm hook usually works well with worsted-weight yarn. Check your yarn's label for the recommended hook size to ensure you're using the one that matches.
Using the right hook makes crocheting easier and gives your granny square a neat appearance. If you're a beginner, start with aluminum hooks—they are smooth and easy to hold.
Additional Supplies for Success
Other essential supplies include a pair of scissors, a yarn needle, and stitch markers. Scissors help trim yarn ends neatly. Use a yarn needle to weave in yarn ends and finish your piece. Stitch markers are handy for keeping track of your place in the pattern.
Consider a crafting kit that includes some of these tools, available at various price points to suit different needs. LindeHobby offers beginner-friendly kits with everything you need, as well as premium options for those looking to invest in high-quality tools.
To start your crochet journey, explore LindeHobby’s wide range of yarns and crochet supplies.
Step-By-Step Guide: Crocheting a Daisy Granny Square
Crocheting a daisy granny square involves beginning with a simple daisy center, then creating charming petals around it, forming the square frame, and adding finishing touches. Follow this guide to bring your granny square to life.
Starting the Daisy Center
To start, gather your materials: a hook, yarn in yellow for the center, and white or any contrasting color for the petals. Begin with a magic circle using the yellow yarn.
Make six single crochets into the circle. Pull the tail to close the center tightly. This creates a neat and tidy daisy middle.
Slip stitch into the first single crochet to secure your circle. Use this method to form a strong foundation for your daisy.
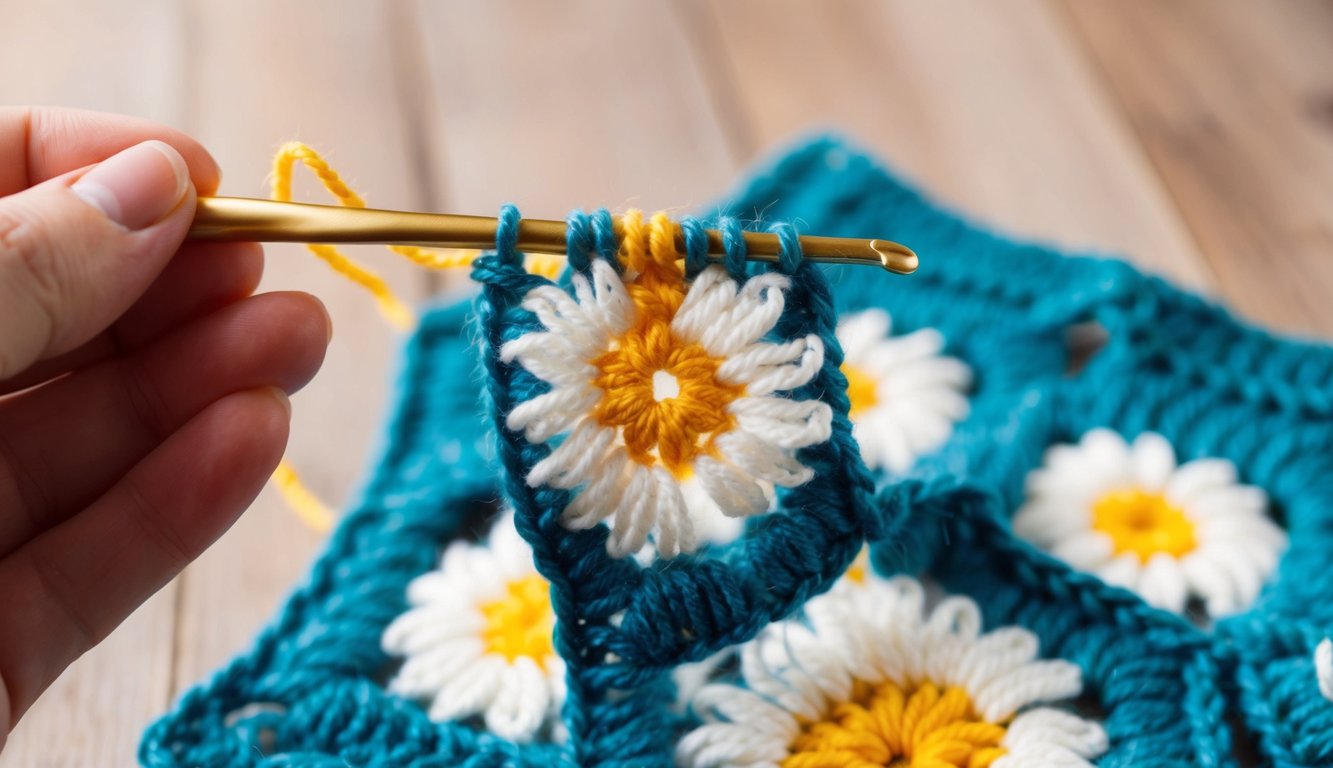
Creating Petals With Crochet Stitches
Switch to the petal color yarn. Begin by chaining two from any stitch on the circle.
Next, create a double crochet into the same stitch. Repeat this pattern around—two double crochets in each stitch. You should now see the petals forming.
Once you’ve gone around, slip stitch into the first stitch to close. Your daisy should now have distinct petals that pop out.
Forming the Square Around the Daisy
Now, it's time to shape the square. Use a new color for the frame or continue with the petal color. Choose your preference.
Start by making a cluster of three double crochets in one space between the petals. Chain two. Skip to the next space and repeat the cluster.
For the corners, make a cluster, chain two, and another cluster. Continue around until you form a square shape. Keep your tension even for a consistent look.
Finishing Touches for a Polished Look
Look over your square for any missed stitches or tension issues. If you see any loose ends, weave them in using a yarn needle.
For extra flair, consider edging your square with a single row of single crochets. This will give it a neat finish and a stronger structure.
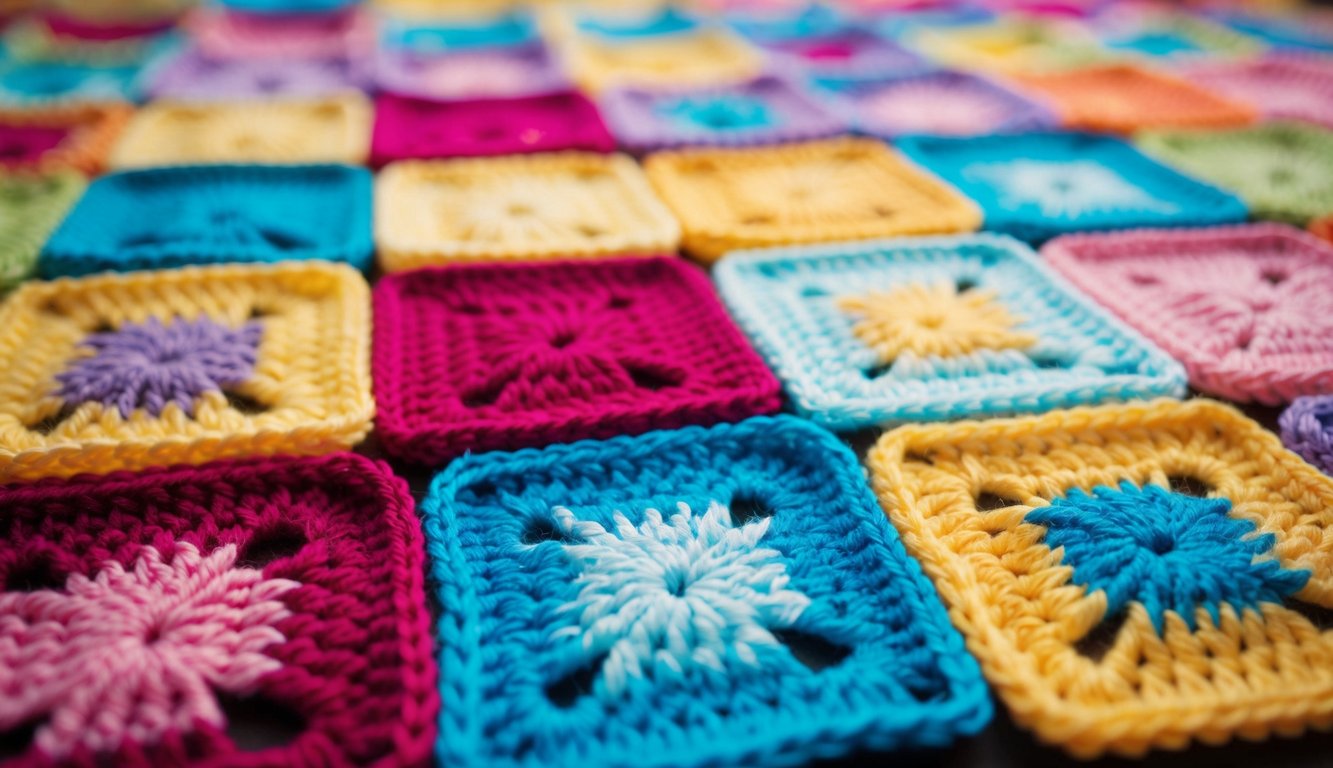
Place the finished daisy granny square alongside others for a larger project. Let your creativity flow. You can create blankets, cushions, or tablecloths.
Ready to start your project? Explore LindeHobby's wide selection of yarns and hooks. Discover quality and variety, and get making today!
Tips for Joining and Customizing Granny Squares
Explore methods to join your daisy granny squares seamlessly, try creative color choices, and find ways to adjust size and shape to fit your project perfectly. These tips will enhance your crafting experience and unleash your creativity.
Seamless Joining Techniques
When joining granny squares, you can choose from various methods to keep your blanket or project looking neat. Slip stitch, for instance, offers a flat and almost invisible finish. This technique is simple and works well for both beginners and seasoned crocheters.
Another effective method is the zigzag join. This technique gives a bit of texture but remains relatively flat. It’s perfect if you're aiming for a unique, handcrafted look. You only need a bit of practice to maintain tension throughout the entire piece.
For a decorative touch, consider the single crochet join. This creates a visible ridge between squares, adding texture and definition. Keep your edges even for the best effect. Experiment to find what fits your style!
Creative Color Combinations
Colors can dramatically change the look of your granny squares. Complementary colors, like blue and orange, make your project pop. Use these pairs if you want each square to stand out distinctly.
For a modern twist, try a monochromatic scheme. Choose different shades of one color, such as light to dark pink, for a subtle gradient effect. This works beautifully in elegant, subdued projects.
Experiment with rainbow patterns for a cheerful effect. Use varied colors for a vibrant, playful vibe. Changing yarns frequently might seem daunting, but it’s worth the effort when you see the lively results!
Adjusting Size and Shape
To fit any project, you'll need to adjust the size and shape of your granny squares. Make your squares larger by adding extra rounds. Simply follow the established pattern and keep on counting stitches to ensure symmetry.
If smaller squares are needed, opt for fewer rounds. This method saves yarn and time while tailoring your piece to your project's specific measurements.
Experiment with different shapes too. Try integrating triangles or hexagons to diversify your piece's layout. This creates unique blankets or throws that showcase your creativity and skills. Remember, at LindeHobby, you’ll find everything you need to start customizing your granny squares today!
Troubleshooting Common Crochet Challenges
Crocheting a daisy granny square can be a relaxing and fulfilling activity, but sometimes you might encounter a few bumps along the way. Whether it's uneven edges or inconsistent stitches, addressing these issues is crucial for creating a beautiful and polished piece.
Fixing Uneven Edges
When your edges are looking more wavy than straight, don’t worry. Uneven edges often occur from varying stitch tension or adding extra stitches unintentionally. First, check your stitch count every couple of rows to ensure consistency.
Make sure you're using the proper hook size for your yarn. If your edges are still uneven, try starching or blocking your finished square. Lay it flat and pin to the correct shape, then mist with water. Once dry, your square should be more uniform.
Correcting Loose or Tight Stitches
Inconsistent stitch tension is a common challenge. New crocheters often grapple with finding the right tension, leading to loose or tight stitches. To achieve even tension, try to keep your hands relaxed.
For tighter stitches, practice holding the yarn looser—thread it over your fingers differently or switch to a larger hook. For loose stitches, grip the yarn more firmly, or use a smaller hook. It's always a good idea to practice with scrap yarn first.
Avoiding Common Mistakes
Even experienced crafters slip up occasionally. To avoid common crochet mistakes, always keep a close eye on your pattern and count your stitches regularly. Double-check the directions after each round to prevent missing stitches or unintentional increases.
Be mindful of hook and yarn size compatibility. Mismatched pairs can lead to unwanted sizing issues. Lastly, crochet in a calm environment. Distractions can lead to mistakes.
By keeping these tips in mind, you not only improve your crochet skills but also enjoy the process more. At LindeHobby, we have a wide selection of yarns and hooks that can help you tackle these challenges. Explore our collection to find the perfect materials for your daisy granny square project today!

