How to Do Slip Knot Crochet: A Beginner's Guide to Mastering This Essential Skill
Crocheting offers endless possibilities, and mastering the slip knot is a simple yet essential skill for any yarn enthusiast. The slip knot serves as the perfect starting point for your crochet journey because it lets you easily adjust the size of your work and helps ensure that your projects are securely anchored. Whether you're an eager beginner or an experienced crafter looking to refresh your skills, this guide will enhance your crochet toolkit.

Creating a slip knot involves just a few easy steps, making it a breeze to learn. Once you've mastered it, you'll be ready to dive into a wide range of crochet projects, from simple pot holders to elegant scarves. Beyond the slip knot, the world of crochet offers relaxation, creativity, and the warm satisfaction of making something with your hands.
Browse our wide selection of yarns and hooks to start your next project today. With each loop you create, you'll build confidence and skill, unlocking the potential to craft beautiful creations.
See all our crochet patterns here
Key Takeaways
- The slip knot is the first step for many crochet projects.
- Creating a slip knot is easy and quick.
- Crochet offers both creative and practical benefits.
Getting Started with Slip Knot Crochet
Slip knot crochet is the first step to beginning your crochet projects. This foundational technique sets you up for success. It ensures your yarn doesn’t unravel as you work on creative designs.
Understanding the Slip Knot
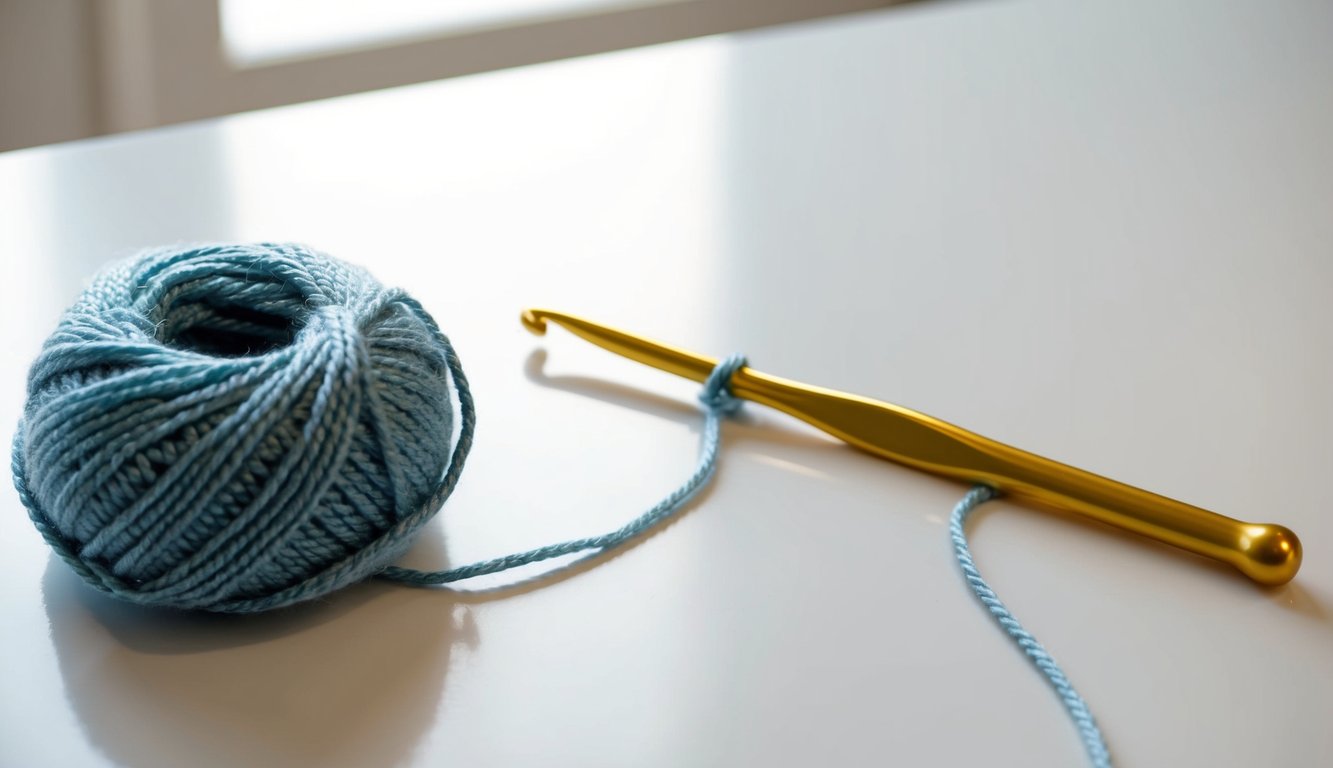
The slip knot is where every crochet journey begins. It’s important for keeping the yarn neat and secure. To make a slip knot, form a loop with the yarn, cross it, and then pull a piece of yarn through. This creates an adjustable knot that can be tightened or loosened around the crochet hook.
Practice creating the slip knot until it becomes second nature. It will help you start every project with confidence. For more tips, consider video tutorials to visually guide you. Mastering this technique will smooth your transition into subsequent steps of crochet.
Materials Needed
For slip knot crochet, gather these materials before starting:
- Yarn: Choose from LindeHobby’s selection. Look for beginner-friendly options such as acrylic or cotton yarn.
- Crochet Hook: LindeHobby offers various sizes, but a 5mm or 6mm hook is ideal for starters.
- Scissors: To cut the yarn once your project is complete.
- Tapestry Needle: Useful for weaving in yarn ends.
Ensure that you have these basic materials ready. They set the foundation for your slip knot crochet practice. With LindeHobby’s budget-friendly supplies, you can start your crochet adventure without breaking the bank. Browse our wide selection today!
Creating Your First Slip Knot
Making a slip knot is the first step in many crochet projects. It's simple to learn and essential for starting a strong foundation. You'll need yarn and a crochet hook to get started, each available at LindeHobby, known for quality and variety.
Making the Loop
To begin, pull out about ten inches of yarn from the ball. This extra length allows you to maneuver easily. Form a loop by crossing the yarn over itself, leaving a tail on one side. Hold the crossover point between your fingers. The working yarn, which leads back to the ball, should be on top.
Next, insert your fingers through the loop. Grasp the working yarn and pull it through to create a new loop. This new loop becomes your slip knot. Tighten it gently by pulling both the tail and the working yarn. This process is simple, yet it forms a secure starting point for crochet.
If you're finding it tricky, practice is key. With a few tries, you’ll get the hang of this foundational technique. Remember, patience is your best tool. Practice with different types of yarn, which you can find in a wide range of colors and textures at LindeHobby.
Securing the Knot
Once you have created the new loop, it’s time to secure your slip knot. Take your crochet hook, and slip it through the loop you’ve formed. Gently pull the working yarn to tighten the loop around the hook. The slip knot should slide easily but stay snug on the hook.
Make sure the knot is not too tight. It needs to move smoothly on the hook without slipping off. If it's too hard to move, adjust it by loosening the working yarn slightly. If the knot feels too loose, pull on the tail to tighten it up.
Mastering the slip knot sets you up for starting various crochet projects like scarves, hats, or blankets with ease. Explore our selection of hooks and yarns designed for all skill levels. Whether you're starting or experienced, LindeHobby supports every crafting journey.
Patience and practice go a long way, and soon you'll be creating slip knots quickly and confidently. Now you're ready for the next steps in your crochet adventure!
Crochet Projects with Slip Knots
Slip knots are essential for various crochet projects. They help create a neat beginning and ensure your yarn is secure. Two primary uses include starting chains and joining yarns. Both techniques are important to master, whether you're working on a simple scarf or a detailed blanket.
Starting Chains
To start a crochet project, slip knots are your first step. Begin by making a basic slip knot on your hook. Ensure it’s snug, not tight. Next, create your foundation chain by wrapping the yarn over the hook and pulling it through the loop.
This method provides flexibility and stability. Keep your loops consistent for even tension across the chain. Experiment with different yarn weights from LindeHobby to see how each behaves, ensuring a perfect start for every project.
Using affordable yarn kits can make testing different methods easier without breaking the bank. Beginners may find success with crochet kits available at LindeHobby, offering everything needed to master starting chains.
Joining Yarns
Slip knots are also useful when joining new yarns or colors in your crochet project. Cut the existing yarn, leaving a few inches for weaving in later. Make a slip knot with the new yarn and place it onto the hook.
Carefully pull the new yarn through the last loop of the project, securing it in place. Be sure to leave enough tail for later weaving. Choose vibrant selections or subtle tones from LindeHobby’s vast range for endless possibilities in your designs.
As you plan your color changes, consider cost-friendly yarn options alongside premium styles, catering to any crochet need. Whether working on small toys or large afghans, LindeHobby’s materials make transitioning yarns a breeze.

