How to Join Tunisian Crochet Squares for Stunning Homemade Creations
Tunisian crochet is a rewarding and versatile craft. If you're excited to combine your squares into a larger project, you're in the right place. The key to joining Tunisian crochet squares is choosing a method that suits your style and skill level. This guide will help you make beautiful projects such as blankets, pillows, or throws.
Materials play a big part in the outcome and feel of your project. Different yarns and hooks offer various textures and effects. You’ll explore ways to connect squares smoothly, ensuring your project looks neat and professionally finished.
Whether you're a beginner or experienced with Tunisian crochet, these tips will help elevate your work. Take the opportunity to experiment with creative combinations and finishing touches. You can find a range of affordable materials and inspiration at LindeHobby. Browse our selection and kick off your next creativity-filled project today!
Explore our yarn collection here!
Key Takeaways
- Choose materials carefully for the desired texture.
- Explore popular joining techniques for a neat finish.
- Try creative variations and finishing touches for unique projects.
Choosing the Right Materials
Choosing the right materials ensures your Tunisian crochet squares fit together seamlessly. Picking suitable yarn, the right hook size, and preparing your squares before you start are important steps in achieving a polished result.
Best Yarn Types for Joining
When joining Tunisian crochet squares, yarn selection impacts the final look and feel. Opt for yarn that matches the fiber content and texture of your squares. This maintains uniformity. Wool, acrylic, and cotton are popular choices.
Consider color harmony. A matching or complementary color helps achieve a cohesive appearance. For a bold look, choose a contrast color.
Blended yarns are offer durability and softness, making them ideal for blankets and garments. LindeHobby has a vast selection of yarns to suit every need, style, and budget.
Explore our yarn collection here!
Recommended Hook Sizes
The right hook size is crucial for neat joins. A hook that matches or is slightly smaller than the one used for creating your squares often works best. If your squares are loose, use a smaller hook to tighten the seams.
Typical hook sizes range from 4 mm to 6 mm, depending on your yarn weight. It's key to test your hook size on a sample square to ensure your seams are smooth and tight. When in doubt, explore LindeHobby’s site for a variety of hooks to meet your crochet requirements.
See all our tunisian crochet hooks here!
Tunisian Crochet Square Preparation
Before you start, ensure your squares are even and shaped correctly. Block your squares for a neat and professional finish. This involves dampening and pinning them to the desired shape.
Ensure all loose ends are woven in, and edges are tidy. This facilitates easy joining and prevents unraveling. Having a consistent stitch pattern across your squares also ensures they align properly.
Using a consistent gauge throughout your squares minimizes differences in size, making them easier to join evenly. If you're searching for high-quality blocking tools and accessories, browse LindeHobby’s wide array of resources to enhance your preparation.
Popular Methods for Joining Tunisian Crochet Squares
Joining Tunisian crochet squares can be both creative and functional. Different techniques offer various looks and strength to your projects. Here are some popular methods to consider, each giving your work a unique finish.
Slip Stitch Seam
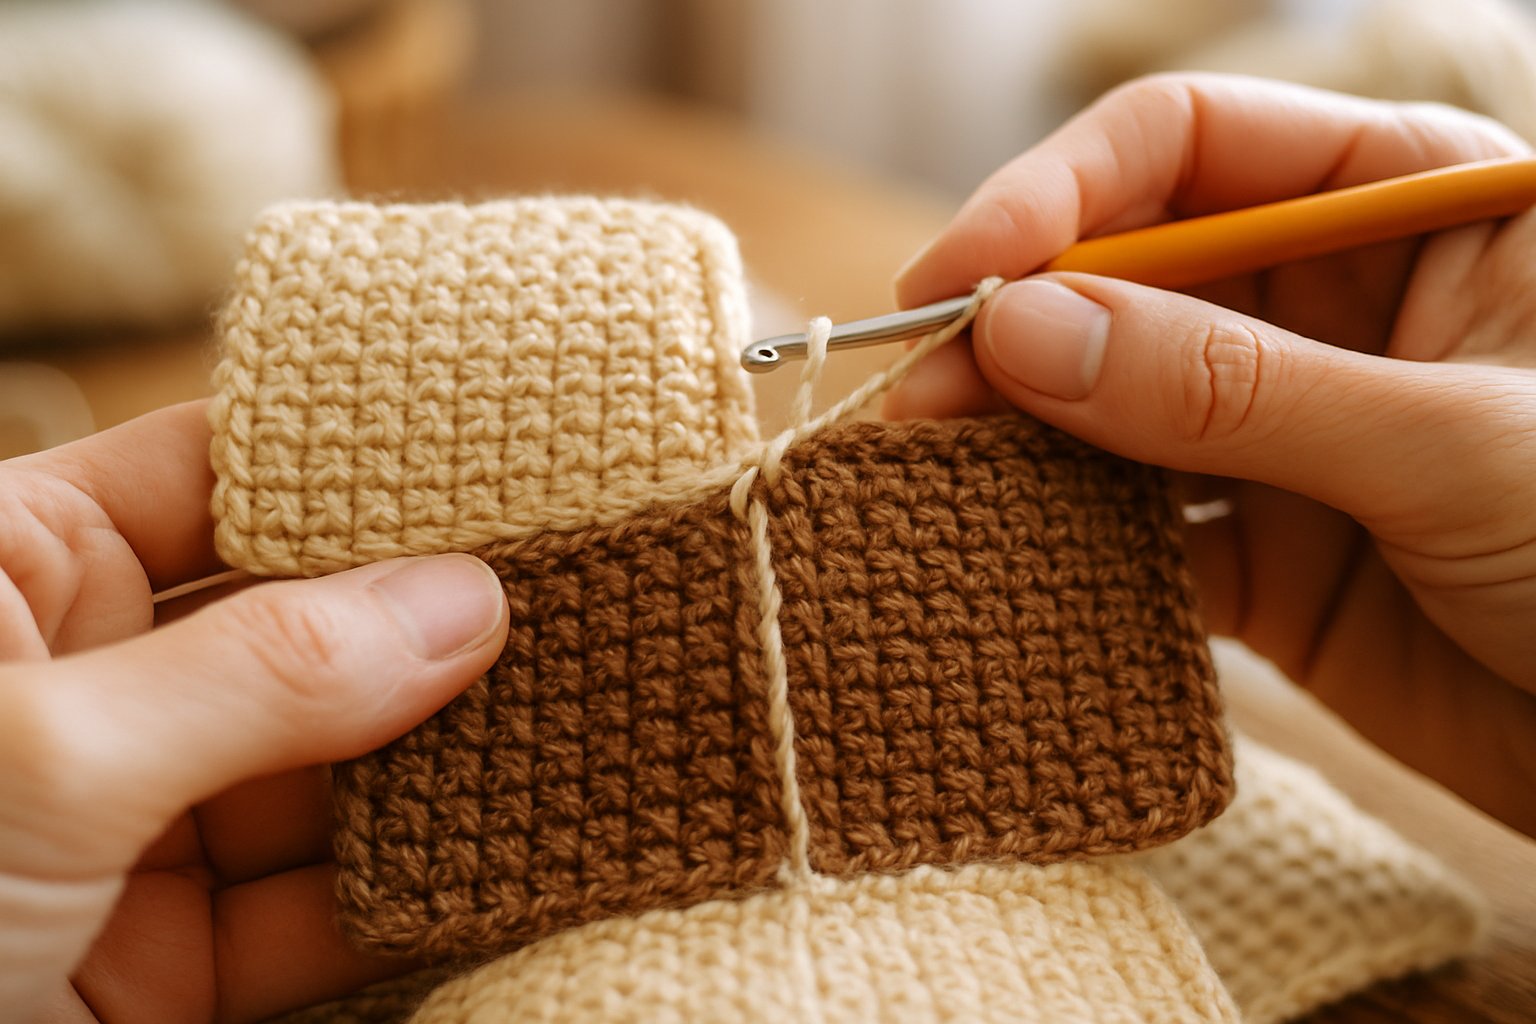
The slip stitch seam is a straightforward technique that creates a neat edge. You work this by holding the wrong sides together and inserting the hook through both loops of the squares. Then, yarn over and pull through all loops on the hook. This creates a flat seam that is not very noticeable on the front side.
This method is great for joining squares that need to lay flat, like blankets or garments. You can find affordable yarn choices at LindeHobby, perfect for slip stitch seams. You might want to practice this seam on a small swatch to perfect your tension.
Whip Stitch Join
The whip stitch join is a sewing technique that is quick and easy. Start by placing your Tunisian crochet squares with the right sides facing up, aligning the edges. Thread a yarn needle with yarn and insert it under both loops of each stitch, pulling the yarn through.
This join is visible, creating a framed look around each square. It's ideal for projects where you want each square to stand out. Experiment with contrasting or matching yarn colors available at LindeHobby to change the visual impact.
Single Crochet Join
The single crochet join adds texture and strength to your project. Place the squares with the wrong sides facing each other. Insert your hook through both loops of the square edges, yarn over, and complete a single crochet stitch.
The raised seam adds a decorative touch, perfect for textured blankets or afghans. You can choose from many yarn types and crochet hooks from LindeHobby to achieve the desired look. This method requires a bit of practice to keep tension even.
Invisible Seam Technique
For an almost seamless look, the invisible seam technique is ideal. Align the squares' edges, right sides up. Use a yarn needle to weave the yarn back and forth through the back loops only. This join blends perfectly, making it hard to see where the squares connect.
It's the best choice for intricate designs where you want to maintain a continuous pattern. Ensure you have a good selection of needle sizes, available at LindeHobby, to match your yarn's thickness. This technique might need more precision, making it perfect for crafters looking to refine their skills.
Step-by-Step Instructions for Seamless Results
Joining Tunisian crochet squares seamlessly ensures a polished look for your project. Key steps involve blocking your squares, aligning them precisely, and working along the edges accurately. Each stage helps achieve professional-looking results.
Blocking Your Squares
Blocking is essential to shape your crochet squares evenly. Materials needed include a blocking board, rust-proof pins, and a spray bottle with water. Lay your squares on the board, gently stretching them to the desired shape. Pin them in place using the rust-proof pins at the corners and along the edges.
Lightly spray the squares with water, ensuring they're damp but not soaked. Let them dry completely, which might take several hours.
Having uniformly blocked squares makes the joining process much simpler. This step will give your project a neat and finished appearance. Proper blocking is especially important for Tunisian crochet, as the fabric tends to curl.
Aligning and Pinning for Precision
Alignment is crucial when joining squares. Place two squares with right sides facing each other, aligning the edges precisely. Use rust-proof pins to secure them at each corner and along the edges. Pinning ensures that the squares do not shift while you crochet them together.
Examine the alignment for any mismatches. Adjust as needed to ensure the squares meet evenly. This precision prevents crooked joins and maintains the overall pattern.
For additional accuracy, pin together several squares to form one long row. Repeat this for other rows, ensuring consistent size and shape.
Working Along Edges Evenly
Use a slip stitch or single crochet to join the squares along the edges. Start at one corner, working along each edge with even tension. Choose a color that matches or complements your squares for a seamless look.
Insert your hook under both loops of the stitch on each square, pulling the yarn through to maintain a neat seam. Pay attention to how the yarn flows and keep your stitches consistent.
Keep your tension steady; this avoids pulling or puckering. Consider using a hook size slightly smaller than used for the squares for tight, clean joins.
Once complete, weave in any loose ends to finish your project neatly. This careful technique ensures the connected squares look like one cohesive piece.
Visit LindeHobby to find quality materials and explore new techniques for your Tunisian crochet projects.
Finishing Touches and Creative Variations
Enhance your Tunisian crochet squares with beautiful finishing touches and explore various creative variations. From adding charming borders to picking vibrant color combinations, these techniques will make your projects uniquely yours. Address common mistakes to ensure your pieces are perfect.
Adding Decorative Borders
Decorative borders add a sophisticated finish to your Tunisian crochet squares. Choose from popular border styles like the picot edge, shell stitch, or a simple single crochet edge.
Borders can be done in contrasting yarn colors to make them stand out or in a matching yarn for a seamless look. When selecting a border, consider the thickness of the yarn and the overall design you're aiming for.
A thin border works well for a subtle touch, while a thick, textured border adds boldness. LindeHobby offers a wide variety of yarns perfect for creating eye-catching borders, helping your pieces come to life with just a few extra stitches.
Color Combinations for Joins
Using different color combinations when joining squares not only enhances your design but also showcases your creativity. Experiment with high contrast shades to create geometric patterns or soft pastels for a more blended look.
For a classic approach, select neutral colors that tie all your squares together without overpowering the individual designs. Make use of color theory to create harmonious palettes that enhance the beauty of your Tunisian crochet.
Consider browsing LindeHobby’s collections to find yarns that inspire you to step out of your comfort zone with new, vibrant combinations.
Troubleshooting Common Mistakes
Even experienced crocheters encounter issues when joining squares. Keep an eye out for pulling or bunching at the seams. This is usually caused by uneven tension, which can be fixed by adjusting your stitch size or practicing consistent tension.
If your pieces aren't aligning correctly, check each square’s measurements to ensure they're the same size. Going step-by-step, lay out your work on a flat surface and use pins to secure your squares before sewing or crocheting them together.
By recognizing and fixing these problems, you ensure your final product looks polished and professional. For those just starting out, LindeHobby provides helpful resources and quality materials to guide you in your crafting journey.

