How to Read Friendship Bracelet Patterns: Master the Art with LindeHobby's Guide
Crafting friendship bracelets is a fun and rewarding activity that lets you express yourself through colors and patterns. If you've ever seen a friendship bracelet and wondered how those intricate designs come together, you're in the right place. Reading and understanding friendship bracelet patterns is the key to creating your own beautiful designs. Whether you're a beginner or a seasoned bracelet maker, understanding these patterns opens up a world of creative possibilities.

Friendship bracelet patterns might seem complicated at first glance, but once you learn the basics, it becomes an easy and relaxing hobby. This craft not only allows you to create lovely accessories but also provides a peaceful and creative experience. With each knot you tie, you’ll see your chosen design come to life, offering a sense of accomplishment and a personal touch to every bracelet you make.
Getting started requires just a few materials, most of which you can find conveniently at LindeHobby. With a range of colored threads and handy guides, you’ll have everything you need to begin crafting. Whether you're making bracelets for friends or yourself, it's a wonderful way to relax and show your creativity.
Key Takeaways
- Learn the basics of reading patterns.
- Simplify complex designs into easy steps.
- Practice builds skill and creativity.
Understanding Friendship Bracelet Patterns
Friendship bracelet patterns are a fun way to express your creativity. By learning to read these patterns, you can create unique designs that make great gifts or personal accessories. This guide will cover the basic parts of a pattern, commonly used symbols, and the different types of designs you can explore.
What Makes Up a Pattern
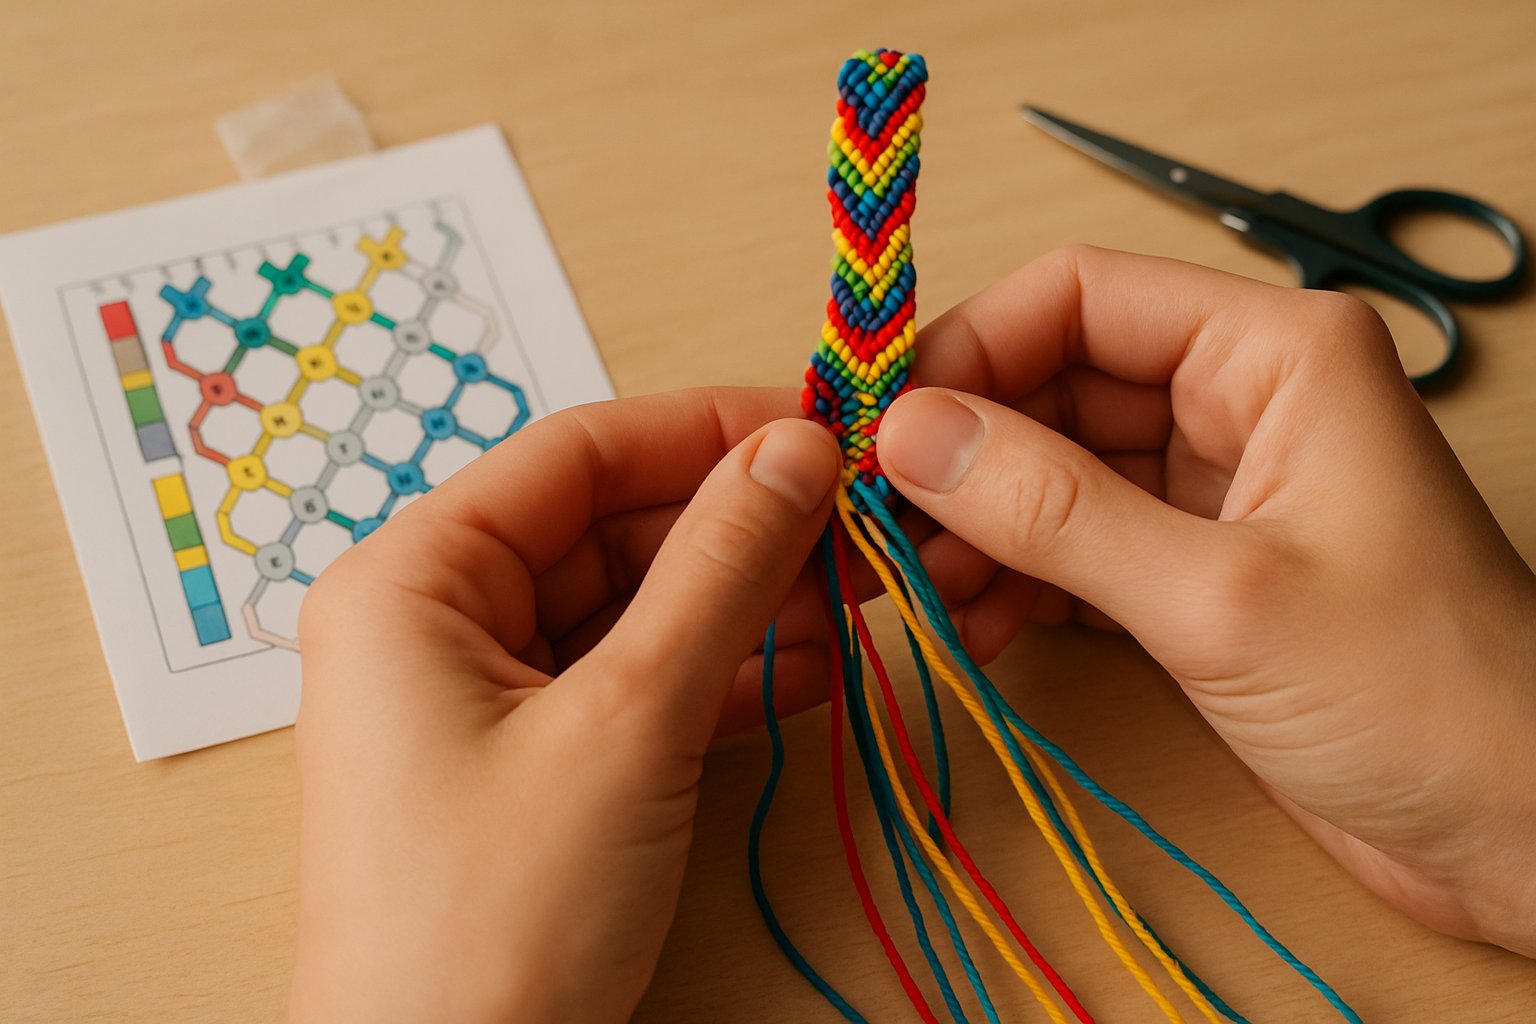
A pattern for a friendship bracelet includes several key components. First, there is the color diagram that shows which colors to use. You might see colors represented as letters or numbers.
Next, look for the knot grid. This grid displays a diagram of how the strings should be tied. Each square often has arrows or symbols indicating the direction and type of knot to use.
The starting position is also crucial. It tells you how to line up your strings before you start knotting. Make sure your strings are ready according to the guide.
Using these elements together helps ensure your bracelet looks like the pattern you chose.
Common Symbols and Notations
When reading a bracelet pattern, understanding the symbols used is important. Forward knots are usually shown with an arrow pointing to the right. This knot is made by tying one string over the other from left to right.
Backward knots often have an arrow pointing left. This involves tying from right to left.
A forward-backward knot might have a zigzag arrow or two arrows. It combines the steps of forward and backward knots.
Knowing these basic symbols will make it easier for you to follow any design. These symbols guide you through each knot to ensure you’re on the right track with your pattern.
Types of Friendship Bracelet Patterns
Friendship bracelet patterns vary in complexity and style. Chevron patterns are popular among beginners because of their simple V-shape.
For those seeking a challenge, diamond patterns offer intricate designs with a bit more complexity. This style can showcase various colors and knots to form diamond shapes.
If you’re an advanced crafter, alpha patterns let you create images and text. They use a different knot layout to allow for detailed pictures and lettering.
With so many pattern types, there’s something to suit every skill level and taste. This variety lets you customize your projects to fit different themes and personal styles.
How to Decode Friendship Bracelet Patterns
Friendship bracelet patterns can look complex at first, but breaking them into parts makes them easier to follow. Focus on reading the grid structure, tracking the direction of knots, and recognizing color codes used throughout the design.
Reading Rows and Columns
Friendship bracelet patterns are usually in a grid, with rows and columns guiding your work. Rows represent each line of knots you'll make, moving left to right. Columns represent each strand of thread, vertically.
You'll start knotting at the top row, following the pattern line by line. Each square in the grid might have a different symbol or color, showing what type of knot to make (forward, backward, etc.).
Make sure your thread matches the number of columns. This ensures you have enough strands to complete the design properly.
Identifying Knot Directions
Patterns use symbols to show which way each knot goes. The main knot types are forward and backward knots.
- Forward knots: Move left to right.
- Backward knots: Move right to left.
These two knots are combined into forward-backward or backward-forward knots. Each symbol in a pattern corresponds to a specific knot or sequence of knots.
Learning these knot types and symbols is key. Practice them on scrap threads before starting your project. Many patterns include a key, explaining each symbol and knot type.
Following Color Codes
Colors are a major part of friendship bracelet patterns. Each column in the pattern will be marked with a specific color. This shows which thread to use in each knot.
Patterns usually start with a list or chart showing which colors match each column. Many use letters or numbers to denote colors, so pay attention to these markings.
Double-check your threads before you start. Choose high-quality threads that match the colors in your pattern. This ensures vibrant, smooth bracelets.
By following these guidelines, you'll create stunning bracelets in no time. LindeHobby has a wide range of threads perfect for any pattern you choose. Explore our collection to find your favorite colors and get started on your next craft today!
Tips for Practicing and Improving
When learning how to read friendship bracelet patterns, practice is essential. Start with simpler designs before trying advanced patterns. Stay organized to avoid frustrating mistakes and be patient with yourself as you learn.
Starting With Simple Patterns
Begin with easy patterns like the Candy Stripe or Chevron. These designs use basic knots that help you understand the fundamentals. Use patterns with fewer colors to focus on learning the knots instead of managing multiple strings.
Pay attention to how the strings interact with each other. Grasping the basic knot sequence is crucial. Practice these simple patterns repeatedly to build confidence and skill.
LindeHobby offers affordable beginner kits to help you start exploring without overspending. Check out their variety of threads and supplies that suit both novices and seasoned crafters.
Troubleshooting Common Mistakes
Mistakes happen. Often, uneven tension or incorrect knots can cause issues. If your bracelet looks lopsided, check for tightness. Strings should be snug, but not overly tight.
Watch out for strings slipping out of order, which might lead to messy patterns. To fix this, slow down and recheck each step. Be patient and start afresh if needed.
LindeHobby provides tutorials to help you overcome common hurdles. Explore their guides to correct and avoid these errors.
Keeping Organized While You Work
Staying organized prevents mistakes. Sort your threads in the order of the pattern before beginning. This helps in keeping track while working. Use a clipboard to keep the bracelet steady, allowing your hands to move freely.
You can also use thread organizers available at LindeHobby. These tools help manage your strings efficiently.
Regularly untangle and sort your threads, ensuring a neat workspace. This attention to organization can save you from frustration as you enjoy creating your bracelet.
Browse LindeHobby’s wide range of organizational tools that will assist you in your crafting journey. Start your project today with everything you need in one place!

