Needlepoint Bookmark: Crafting a Personalized Keepsake with LindeHobby Inspiration
Needlepoint bookmarks offer a wonderful blend of creativity and practicality for both novice and experienced crafters. Picture settling into a cozy corner, your latest novel in hand. With a unique needlepoint bookmark, you can mark your place with style. Needlepoint projects like these can help you relax while also expressing your personal style.

Creating your own needlepoint bookmark is easier than you might think. You'll explore different patterns and techniques tailored for every skill level. This craft requires minimal supplies, making it an affordable and accessible hobby to dive into. Plus, the satisfaction of completing your own project is incredibly rewarding.
Beyond crafting, you can infuse your bookmarks with personal touches, making them perfect gifts for friends and loved ones. Use colors or patterns that reflect their interests, and your gift will surely be cherished. Dive into this engaging craft and discover the joy of creating something both beautiful and useful.
Key Takeaways
- Needlepoint bookmarks are creative and practical.
- Crafting them is simple and budget-friendly.
- Personalize bookmarks for thoughtful gifts.
Getting Started With Needlepoint Bookmarks
Creating needlepoint bookmarks is a fulfilling craft that combines creativity with practicality. Exploring materials, tools, and designs will set you on the right path to crafting beautiful bookmarks.
Choosing the Right Materials
The right materials are key to successful needlepoint bookmarks. Begin with a piece of needlepoint canvas. This is where you'll stitch your design. The most common types are mono canvas and interlock canvas.
For threads, consider using cotton, wool, or silk. Each offers different textures and finishes. Choose colors that will highlight your design.
When thinking about the finishing touches, decide on using a fabric backing for a polished look. Fabrics like felt or cotton can complement your chosen thread colors.
Essential Tools and Supplies
Needlepoint requires specific tools to make crafting easier. Needles should match the canvas and thread size. Tapestry needles, which have blunt tips, are often best.
A small pair of scissors is essential for cutting thread precisely. For comfort, consider an embroidery hoop or frame to keep the canvas taut.
A good light source will help you see your stitches clearly, while a needle threader can make threading easier, especially for beginners.
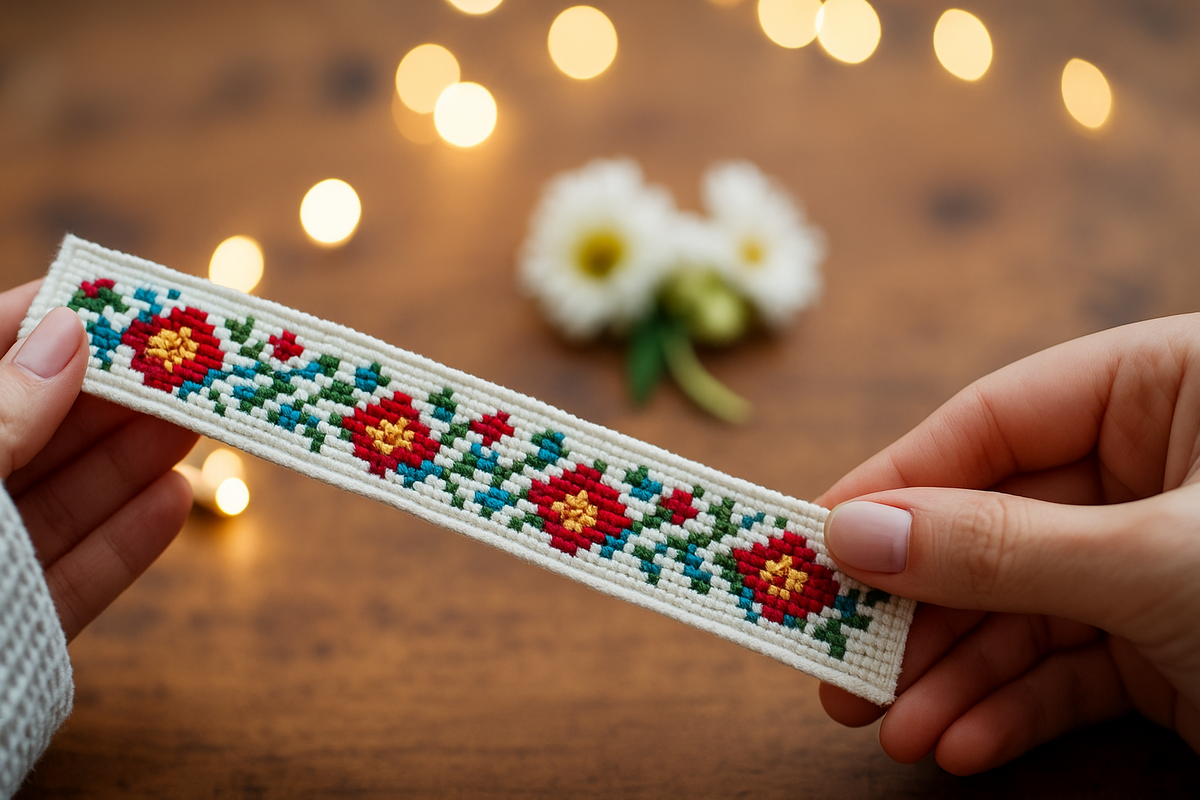
Selecting Patterns and Designs
Choosing the perfect pattern for your bookmark is fun. Start with simple designs if you're a beginner. Patterns with repeating shapes or stripes are easy to follow.
More experienced crafters might enjoy intricate designs or personalized initials. Patterns often include a color chart, detailing the thread shades needed. You can create your own design by sketching on graph paper. This lets you personalize your book accessory.
To find inspiration, browse through books or online resources, like those available at LindeHobby. With a wide range of choices, you're sure to find something that suits your taste.
Explore our range of supplies to start your needlepoint journey with LindeHobby. Whether you're aiming for a vibrant, colorful design or a simple, chic finish, we have what you need to begin your craft today!
Step-By-Step Guide to Making a Needlepoint Bookmark
Creating a needlepoint bookmark is a fun and creative project that lets you combine practical crafting skills with artistic expression. You'll start by preparing your canvas and learning basic stitches, then finish by adding neat edges.
Preparing Your Canvas
Choose a needlepoint canvas that suits your design. A fine mesh canvas works well for detailed patterns, while a coarser mesh is great for bold designs.
Cut the canvas slightly larger than your desired bookmark size to allow for finishing.
Mark the edges with masking tape to prevent fraying.
Select a strong thread in a color that contrasts nicely against your canvas, adding a pop of color.
Consider a kit from LindeHobby that includes canvas, thread, and needles in one convenient package, perfect for beginners and experienced crafters alike.
Basic Needlepoint Stitches
Learn a few essential stitches to bring your design to life. The tent stitch is simple and creates a neat grid.
Bargello patterns use vertical stitches of varying lengths and are perfect for bold designs.
Cross-stitches add texture and interest. Practice each stitch on scrap fabric to gain confidence.
Mix stitches creatively to craft unique patterns. With your newfound skills, let your imagination roam as you stitch your bookmark, turning a simple canvas into a work of art.
Finishing and Edging Techniques
Once your design is complete, it's time to tidy up. Trim excess canvas around your design, leaving a small border.
You can fold and sew the edges for a clean look or use a decorative stitch like a whip stitch for a polished finish.
For added flair, consider sewing a fabric backing to your bookmark. This not only hides the messy backside but adds weight and durability.
Make your bookmark truly special by attaching tassels or beads, available from LindeHobby’s wide selection.
When you're ready to explore new projects and need supplies, visit LindeHobby to find all the materials you need to keep crafting exciting!
Creative Ideas and Personalization
Needlepoint bookmarks can be unique with a little creativity. Adding colors, textures, monograms, or motifs makes each piece special. These customization ideas transform simple bookmarks into personal treasures.
Incorporating Colors and Textures
Choosing the right colors and textures can make your needlepoint bookmark stand out. Think about using bold, vibrant hues to create striking patterns, or opt for soft, pastel shades for a gentle look. Mixing different textures of yarn can add depth and interest as well.
Use threads like cotton, silk, or wool to offer different feels. Experiment with patterns like stripes or dots to give your bookmark a fun twist. Don't be afraid to mix bright colors with neutrals to add contrast and eye-catching appeal.
Adding Monograms or Motifs
Personalizing your needlepoint bookmark with monograms or motifs is easy and meaningful. Start by selecting a design that has significance, such as your initials or a favorite symbol. These can be stitched into the fabric to add a personal touch.
Choose motifs like flowers or stars to reflect your interests. Monograms can be bold or delicate, depending on your style. For a special gift, stitch the recipient’s initials to make it truly one-of-a-kind. Use simple templates or freehand your design for a custom look.
Caring for and Gifting Your Needlepoint Bookmark
Taking good care of your needlepoint bookmark keeps it looking beautiful for years. Gifting it in a thoughtful way makes it even more special. Learn cleaning tips and how to present it as a gift.
Cleaning and Storage Tips
To keep your needlepoint bookmark clean, gently hand wash it in cool water with mild soap. Avoid hot water to prevent colors from running. After washing, lay it flat on a towel and press gently to remove excess water. Let it air dry away from direct sunlight.
For storage, keep your bookmark in a cool, dry place. Avoid folding it to prevent creases. Using a small, flat box with tissue paper can help keep it in shape. If needed, lightly iron the back side with a cloth between the iron and the bookmark. Make sure the iron is on a low setting to avoid damage.
Tip: Regularly inspect your bookmark for loose threads or unraveling. A tiny dab of fabric glue can secure small snagged threads.
Thoughtful Presentation and Gift Wrapping
When giving a needlepoint bookmark as a gift, presentation matters. You could wrap it in eco-friendly paper for a simple yet elegant touch. Add a handwritten note to make it personal.
Consider using a small box lined with tissue paper to protect the bookmark. If you want to add a special touch, tie the box with a ribbon.
Another idea is to pair it with a book by the recipient’s favorite author. This makes for a complete and thoughtful gift.
Tip: Include basic care instructions in your card to help the recipient maintain the bookmark’s beauty.
Explore our range of needlepoint supplies at LindeHobby to create your perfect bookmark today!

